KALE PESTO

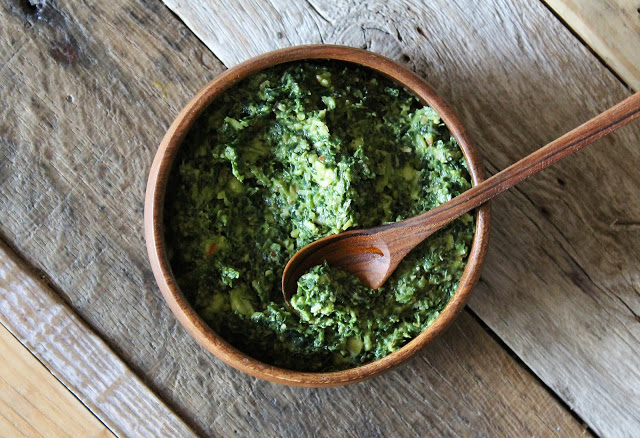
It's America's favorite superfood for the billionth year running...........yes, it's KALE. If you're a kale lover (ME) and not a kale hater, this simple, healthy & ingenious recipe is just for you. Requiring little more than a food processor and a few extra minutes on your hands, it's the perfect thing to make when your cooking mind is blank and you have no idea what's for dinner. Got some plain pasta? Boom. Kale pesto pasta. Got an ordinary soup that needs a little dollop of something extraordinary on top? This is your go-to (it's really great on top of a creamy white bean & rosemary blended soup, if you need more suggestions). How about just some toasted bread and a perfectly cooked soft egg? Boom again. Breakfast--or lunch or dinner, really--is served. 

This recipe is one I've barely managed to write down over the years, since I mostly make it by intuition, and once you've tried it you'll see what I mean. You just

know

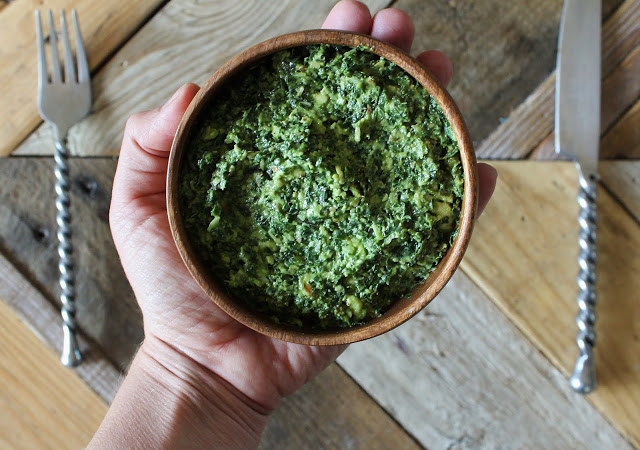
when this bright green, flavorful spread comes together. Still, the proportions in the following recipe are a great way to get started, and can easily be multiplied, so give it a try!

Kale Pesto

Makes about a cup of pesto

1 tightly packed cup curly kale (rinsed well under hot water and de-stemmed)

1 clove garlic

1/3 cup ground almonds

2 tablespoons grated parmesan

1 tablespoon lemon juice

3 tablespoons olive oil

pinch of sea salt

freshly ground pepper

Place kale leaves and garlic in the bowl of a food processor, pulse a few times until roughly chopped. Add garlic & parmesan, continue to pulse. Add lemon juice and blend steadily, then pour in olive oil in a steady stream until everything is in and pesto is a thick paste. Taste, add salt & pepper as needed, then serve.

BOWLS OF CHERRIES


Yes, I pitted each and every single one of these cherries myself...with a knitting needle, in fact (the simple reason for which is that I do a lot more knitting then I do cherry pitting, so guess which pointy metal object is more readily available around my house?). It is, I believe, a thing that everyone should sit down and do at least once per cherry season. The rest of the year, you can pull your bag of frosty, pre-pitted cherries from the freezer like everyone else--totally admit to this habit myself--whenever you're in need of a homemade cherry pie, cherry syrup, muffins, an addition to a smoothie. 

But promise me this. 

Promise me that at least once a year, you'll sit down with a bowl of these beauties and work through the meditative act of poking each stone through the fruit by hand, one at a time. And as you pit each stubborn little devil, try to really think about the work itself. Think about how many deft fingertips had to pluck and pluck and pluck to fill this bowl full of juicy red fruits. Think about how many cherries had to first be carefully pitted to create each mouthful of cherry pie you've ever devoured, streaked with marbled scarlet-and-pink swirls of melting vanilla cream. Silently thank every cherry pie baker you've ever known, for their perseverance, for their deeply stained fingertips, for their dexterous way with a cherry pitter or a sharp knitting needle. 


And then do whatever you can to prolong cherry season, and to make the most of each single cherry you hand-pitted for someone's pleasure. If you're looking for suggestions, I'd suggest this recipe for pickled cherries. They're sweet, tart, with a faint background of salt, caramelly tones from brown sugar, nuanced notes of allspice, clove and pepper. These would be equally at home on a cheese plate, a kale salad spiked with goat cheese, or even a tender pulled pork sandwich.


Sweet & Tart Pickled Cherries

Makes about one quart

1 cup water
1/3 cup light brown sugar
1 tablespoon salt
1/2 teaspoon ground allspice
small handful of whole black peppercorns (around 20)
whole cloves (also about 20)
1/2 cup white vinegar
4 cups fresh sweet cherries, pitted

Place water, sugar, salt and spices in a small saucepan, heat just to boiling then remove from heat. Stir until sugar and salt are dissolved, let mixture steep for about five minutes. Add vinegar and cherries to mixture.

Let cool completely, then place in airtight container (note: leave whole spices in with the cherries & pickling brine, as they will continue to flavor the mixture. Just be careful to leave them behind when you remove the cherries for eating!) and refrigerate. Enjoy on everything from cheese plates to savory sandwiches within three weeks of pickling. Happy summer, cherry pitters!